I researched it and there are published ways for cleaning the virus off of the system, but in the case of a severe virus infection, I prefer to securely erase the hard drive and start over. Since I have data that needs to be saved, I'll use antivirus software on the next reinstall of Windows to clean the files, but for now I need to get them off of the PC without accessing Windows.
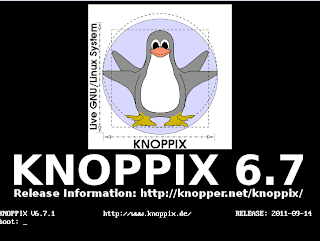
I made sure that I had a USB flash drive or USB hard drive that was large enough to store the data that needed to be saved. On a non-infected machine, I also downloaded a Linux Live CD (I used Knoppix in this case, but any distribution with a Live CD and the ability to mount, create, and edit NTFS volumes will work) and burned it to DVD. Many other users use Ubuntu, but I typically use Knoppix because it was the first live CD that I was exposed to. Here's where we will pick up the "how to" piece of this blog
I've used this procedure on virtually every modern version of Windows (Windows XP, Windows Server 2003, Windows Vista, Windows Server 2008, Windows 7, Windows Server 2008 R2, and Windows 8 Developer Preview).
Rescuing data using a Linux Live CD is useful in the following scenarios
- Corrupted/unbootable operating system
- Systems with failing hard drives where it is preferred to minimize the I/O activity on the disk to save the data
- Severe virus/malware infection
- Accessing the contents of a filesystem that you do not have permissions to access (ex. accessing a sysadmin's laptop after he/she leaves the company)
- Systems that crash where the data is not backed up
Boot the system where the data needs to be recovered from the Linux Live CD.

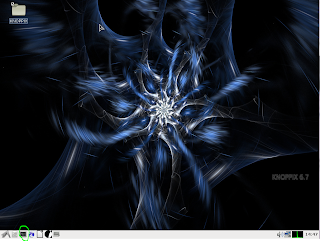
Hit enter and load the Operating System to access the desktop. Open a couple of terminal windows.

Use the kernel log to identify the drive that Windows is on (it usually starts with hd or sd and you can identify it by the size of the drive),
knoppix@Microknoppix:~$ dmesg | egrep "hd|sd"
[    0.925358] sd 0:0:0:0: [sda] 41943040 512-byte logical blocks: (21.4 GB/20.0 GiB)
[    0.925388] sd 0:0:0:0: [sda] Write Protect is off
[    0.925389] sd 0:0:0:0: [sda] Mode Sense: 00 3a 00 00
[    0.925402] sd 0:0:0:0: [sda] Write cache: enabled, read cache: enabled,
                                 doesn't support DPO or FUA
[    0.925876] sd 0:0:0:0: Attached scsi generic sg0 type 0
[    0.961321]  sda: sda1 sda2
[    0.961584] sd 0:0:0:0: [sda] Attached SCSI disk
It is also clear that the hard drive has two partitions, sda1 is the Windows boot partition and sda2 is the Windows system partition (this is where the user data most likely resides).
[ 0.961321] sda: sda1 sda2
The next steps require root access, so perform a switch user (su) to root,
knoppix@Microknoppix:~$ su -
root@Microknoppix:~#
From here, we want to create a temporary directory to mount the Windows system's C:\ drive (/dev/sda2) to and mount the partition,
root@Microknoppix:~# cd /
root@Microknoppix:/# mkdir old_windows
root@Microknoppix:/# mount -t ntfs /dev/sda2 /old_windows
Now, let's see if our files are out there,

Since the volume mounted properly, the user specific data (including My Documents, My Pictures, My Downloads, etc) is now located in /old_windows/Users. Now, let's insert the flash drive and get ready to pull the data off. Insert the flash drive and run dmesg again, this time the hard drive information should appear at the end.
root@Microknoppix:~$ dmesg
[ 1470.286199] usb 1-1: SerialNumber: 812520090519
[ 1470.297467] scsi3 : usb-storage 1-1:1.0
[ 1471.320076] scsi 3:0:0:0: Direct-Access     USB Mass Storage Device
                             PQ: 0 ANSI: 0 CCS
[ 1471.325288] sd 3:0:0:0: Attached scsi generic sg2 type 0
[ 1471.355487] sd 3:0:0:0: [sdb] 3842048 512-byte logical blocks: (1.96 GB/1.83 GiB)
[ 1471.364823] sd 3:0:0:0: [sdb] Write Protect is off
[ 1471.364829] sd 3:0:0:0: [sdb] Mode Sense: 03 00 00 00
[ 1471.373389] sd 3:0:0:0: [sdb] No Caching mode page present
[ 1471.373395] sd 3:0:0:0: [sdb] Assuming drive cache: write through
[ 1471.421455] sd 3:0:0:0: [sdb] No Caching mode page present
[ 1471.421461] sd 3:0:0:0: [sdb] Assuming drive cache: write through
[ 1471.431030]  sdb: sdb1
[ 1471.484867] sd 3:0:0:0: [sdb] No Caching mode page present
[ 1471.484872] sd 3:0:0:0: [sdb] Assuming drive cache: write through
[ 1471.484878] sd 3:0:0:0: [sdb] Attached SCSI removable disk
In this case, let's assume that we are going to be creating a large archive and need to have files larger than 2 GB. We will need to reformat the drive to use ntfs using fdisk on /dev/sdb (the flash drive).
#cd /
#fdisk /dev/sdb
WARNING: DOS-compatible mode is deprecated. It's strongly recommended to
         switch off the mode (command 'c') and change display units to
         sectors (command 'u').

Command (m for help): o
Building a new DOS disklabel with disk identifier 0x47ad9ab9.
Changes will remain in memory only, until you decide to write them.
After that, of course, the previous content won't be recoverable.

Warning: invalid flag 0x0000 of partition table 4 will be corrected by w(rite)

WARNING: DOS-compatible mode is deprecated. It's strongly recommended to
         switch off the mode (command 'c') and change display units to
         sectors (command 'u').

Command (m for help): n
Command action
   e   extended
   p   primary partition (1-4)
p
Partition number (1-4): 1
First cylinder (1-1203, default 1):
Using default value 1
Last cylinder, +cylinders or +size{K,M,G} (1-1203, default 1203):
Using default value 1203

Command (m for help): w
The partition table has been altered!

Calling ioctl() to re-read partition table.
Syncing disks.
root@Microknoppix:/# mkfs.ntfs /dev/sdb1
Cluster size has been automatically set to 4096 bytes.
Initializing device with zeroes: 100% - Done.
Creating NTFS volume structures.
mkntfs completed successfully. Have a nice day.
After the filesystem is initialized, let's create another directory and mount the flash drive.
mkdir /flashdrive
mount -t ntfs /dev/sdb1 /flashdrive
Now create an archive containing all of the home directories for users of the Windows system (or the specific directories that you need... whatever the case).
tar czvf /flashdrive/save_data.tar.gz /old_windows/Users
Now verify that the files are in the archive and unmount the flash drive and the Windows partition. If you are still in the /flashdrive directory with your terminal, you may get a device busy message. Simply cd to /.
tar tzvf /flashdrive/save_data.tar.gz
umount /flashdrive
umount /old_windows
Now remove the flash drive. We will now securely erase all of the data, including the master boot record, on the infected hard drive using the shred command. Note that if you are using this procedure for a failing disk (and not an infected system), this is an optional step. A fun note here is that a parameter between 7 and 35 for the -n parameter of the shred command is considered to be secure erasure of the disk. To be quick, I simply overwrote the data on disk twice, once with a random pattern and once with 0s.
shred -z -v -n 1 /dev/sda
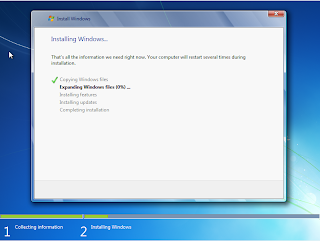
Now reboot the system and reinstall Windows, but do not insert the flash drive until after we have installed an antivirus, performed updates, and created a non-privileged account to extract the files and begin the virus scan.

After installing all updates and installing an antivirus, install 7-zip and extract the archive to the disk. Run antivirus scans to make sure that any viruses resident in the files are detected and removed. Note that there is some risk of reinfection here because antivirus software does not pick up all of the variants of all known malware and viruses.
You may need to extract it again if it creates a saved_data.tar file instead of fully extracting the files. Before opening any of the files, run a full virus scan first.
See Also,
Windows Crash Dump Analysis
How to Detect a Failing Hard Drive
How to Edit the Registry of an Offline Windows System
No comments:
Post a Comment